The first time I realized pizza could be made on a grill I had two thoughts: the first one was “why didn’t I think of that?” and the second one was “I’m making that for dinner tonight!” While pizza may always be the perfect choice for dinner, it isn’t always the ideal temperature outside to heat the oven to 450°F or higher. Grilled pizza to the rescue! Not only does grilling keep the house cool while delivering a homemade pizza on your dinner table, the smoke mimics a wood fired oven which enhances its flavor. (Can you say “YUM”?)
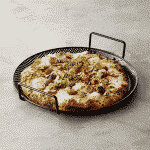
The final two bonuses? It’s deliciously affordable to grill your own pizza and it’s super easy to make! And no, the pizza dough does not fall through the grill grates if you take advantage of our Gadget of The Month.

Homemade Pizza Recipe
Pizza dough is a yeasted dough which requires active dry yeast. Make sure the check the expiration date on the yeast package before you begin! Yeast that is too old may be dead and won’t work.
You can use all-purpose flour instead of the bread flour that is called for in the recipe, but bread flour is higher in gluten than all-purpose flour and will make a crispier crust for your pizza.
Cup measurements can vary depending on how you are scooping the flour (we fluff the flour, lightly scoop it, and level with a knife). So, I recommend using a kitchen scale to measure out the flour amounts by weight. This is the only way you’ll get a consistently accurate measurement.
INGREDIENTS
Pizza Dough: Makes enough dough for two 10-12 inch pizzas
1 1/2 Cups (355 ml) warm water (105°F-115°F)
1 Package (2 1/4 teaspoons) of active dry yeast
3 3/4 Cups (490 g) bread flour
2 Tablespoon olive oil (omit if cooking pizza in a wood-fired pizza oven)
2 Teaspoons salt
1 Teaspoon sugar
INSTRUCTIONS
1. Proof the Yeast: Place the warm water in the large bowl of a heavy duty stand mixer. Sprinkle the yeast over the warm water and let it sit for 5 minutes until the yeast is dissolved.
After 5 minutes stir the yeast to ensure that it has dissolved completely. The yeast should begin to foam or bloom, indicating that the yeast is still active and alive. Note that if you are using “instant yeast” instead of “active yeast”, no proofing is required. Just add to the flour in the next step.
2. Make and Knead the Dough: in a separate bowl mix together the flour, salt, and sugar. Add this mixture to the heavy stand mixer bowl and add olive oil. Using the mixing paddle attachment, mix on low speed for a minute. Then replace the mixing paddle with the dough hook attachment.
Knead the pizza dough on low to medium speed using the dough hook about 7-10 minutes.
If you don’t have a mixer, you can mix the ingredients together and knead them by hand.
The dough should be a little sticky, or tacky to the touch. If it’s too wet, sprinkle in a little more flour.
3. Let the Dough Rise: Spread a thin layer of olive oil over the inside of a large bowl. Place the dough in the bowl and turn it around so that it gets coated with the oil.
At this point you can choose how long you want the dough to ferment and rise. A slow fermentation (24 hours in the fridge) will result in more complex flavors in the dough. For a quick rise, place the dough in a warm place (75°F to 85°F) for 1 1/2 hours. Cover the dough with plastic wrap and allow the dough to double in size for best results.
For a medium rise, place the dough in a regular room temperature place (your kitchen counter will do fine) for 8 hours. Keep in mind the longer the rise (to a point) the better the flavor the crust will have.
4. Making the Pizza: Dust your hands with flour and push the dough down so it deflates a bit. Empty dough on a floured surface and divide the dough in half.
Working one ball of dough at a time, flatten it with your hands. Starting at the center and working outwards, use your fingertips to press the dough to 1/2-inch thick. Turn and stretch the dough until it will not stretch further. Let the dough relax 5 minutes and then continue to stretch it until it reaches the desired diameter – 10 to 12 inches.
Treat the dough gently! If a hole appears in your dough, place the dough on a floured surface and push the dough back together to seal the hole.
5. Brush Top of Dough with Olive Oil: Use your finger tips to press down and make dents along the surface of the dough to prevent bubbling. Brush the top of the dough with olive oil (to prevent it from getting soggy from the toppings). Let rest another 10-15 minutes.
6. Heat the Grill: You should heat it quite hot; our grill was about 600°F with the lid on while baking the pizza. Aim for at least 550°F. If you have a choice on your grill between direct and indirect heat, set it up so the pizza is over direct heat.
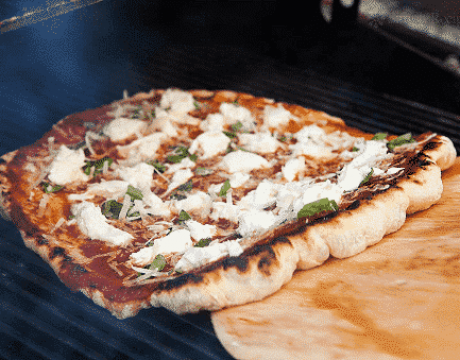
7. Grill One Side of the Pizza: Take the lid off the grill. Lay the dough round on the grill with the olive-oil side down. Brush the top of the dough with a thin layer of olive oil, too. Let the dough cook for about 3 minutes, with the lid off, or 1 to 2 minutes with the lid on. Use tongs to lift up the dough from time to time, checking on how it is doing. You want grill marks on it, but you don’t want the dough to get crispy; it should be just set.
8. Top the Pizza: Flip the dough over with the tongs or spatula. The dough should come up easily and flip without tearing. Now is where your organization comes in! You need to top the pizza quickly. Spread on a thin layer of sauce, some cheese, and toppings. It shouldn’t be too heavily loaded, or the pizza won’t cook well.
9. Cook the Pizza: Put the lid on and cook for 3 to 5 minutes. Use your sense of smell; if the pizza smells like it’s scorching, take the lid off and move the pizza to a cooler part of the grill or turn the heat down.
10. Remove the Finished Pizza: Remove the lid and check the pizza. The edges should be crisp and well-done, and the cheese should all be melted. Drag the pizza off with the spatula or tongs. Let cool for 3 minutes, then cut into pieces and eat!


